Service explanation for JA-81F 1 Installation Installation should only be done by a certified technician approved by an authorised distributor.The control panel is for indoor use only, preferably near an entrance door. Avoid placement close to metal which may interfere with wireless communication. 1. Open the housing by pressing the...
JA-81F
Too much choice? Chat or call us at 085-0160316
There are no products in these categories. Shop on.
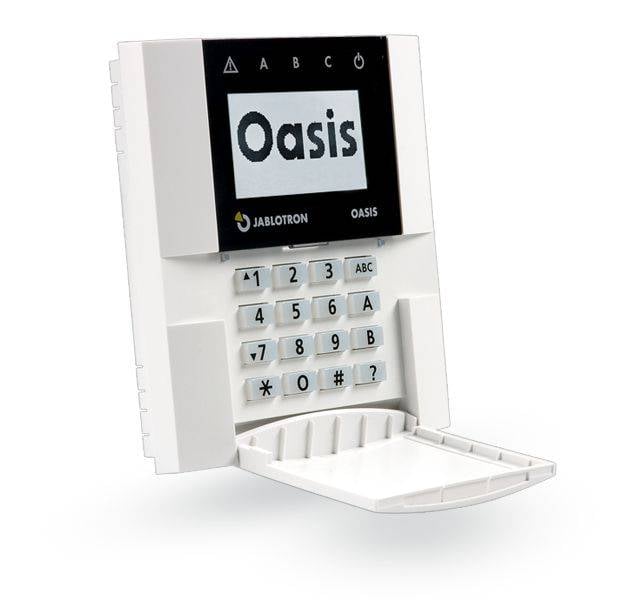
Service explanation for JA-81F
1 Installation
Installation should only be done by a certified technician approved by an authorised distributor.
The control panel is for indoor use only, preferably near an entrance door. Avoid placement close to metal which may interfere with wireless communication.
1. Open the housing by pressing the lip at the bottom using a screwdriver
2. Place the back at the desired location
3. Install the external wired detector (if necessary) route the cable through the rear housing and connect it to the IN and GND terminals.
4. Register the control panel with the central controller (See central controller installation manual):
- Enter the teach-in mode in the central controller (if no control panel is already present, briefly connect the reset link to the main board in the central controller or, if a control panel is already present, press the 1 in service mode).
- Insert the batteries in the control panel to start teach-in.
- You exit the teach-in mode by pressing the # key.
5. Reconnect the control panel to the rear housing
6. Instructions on how to use the control panel can be found in the control panel manual.
2 Sleep mode of the control panel
As long as the control panel is powered by batteries, it will switch itself off after 20 seconds of inactivity (15 minutes in service mode) to save energy. The control panel is activated by: Opening the cover, pressing a button or activating a connected external sensor.
3 Optional AC adapter
If the control panel is powered by an AC adapter (model: Jablotron DE02-12 - for +U and GND connections), the control panel will not switch itself off after 20 seconds of inactivity. If the adapter is used, the batteries must remain in the control panel. Turn on the AC adapter only after the panel has been activated by batteries and the 2 halves of the housing and back are on top of each other.
4 Test communication of the control panel
In service mode, the control panel can check the radio signal of the control panel, and measure the strength of the signal. To test the control panel signal, you can activate the IN input or activate its tamper switch.
Please note: The control panel measures the signal strength of the signal sent by the control panel. It is impossible to measure the signal strength sent by the control panel. If the control panel no longer has communication with the console (e.g. if the console is damaged), the control panel indicates a communication fault. If you restart the control panel with a connected control panel and the control panel does not work, we recommend removing and reinserting the batteries.
5 Disabling the tamper switch.
The PgX output can be switched on and off by holding down the Ü (on) and the # (off) for 5 seconds. The function of the PgX must be set via the central unit. A long tone confirms the setting.
6 Changing text on the control panel
It is recommended to use a PC with OLink software to set the text. To move the modified text from the PC to the control panel, the battery-operated control panel will need to be connected to the Oasis system using a bus cable to the control panel and another cable from the control panel to the PC or directly to the PC.
The names can be entered via the control panel in the ''Edit Text'' menu - for this, see the control panel installation manual. The entered text is only stored in the control panel used for data entry.
7 Replacing batteries
The system monitors the status of the batteries and if they are low, the user and/or the installer will be warned. The control panel will continue to operate and will give a battery low indication. The batteries must be replaced within 1 week by a qualified installer with the control panel in service mode
Note: both batteries must be replaced at the same time and must be identical.
8 Removing the control panel from the system
If the control panel is removed from the system, the control panel will display. If you want to remove the control panel, the panel must first be removed from the control panel.